Changing a wheel
- Ensure that the car is park out of the road on an even surface and in a visible area.
- Pull the handbrake.
If the front of the car is facing upwards, put the first gear.
If the front of the car is facing downwards, put the reverse gear. - Wear the yellow jacket and put the warning triangles in front and behind the vehicle. Everybody needs to leave the vehicle.
- Release the spare tyre, take the jack and the wheel spanner from the car.
- Place a big rock in front of and behind of the opposite tyre to the one needed to be changed.
- Unscrew partially the wheel nuts using the wheel spanner until you can do it easily. Do not completely remove the nuts yet.
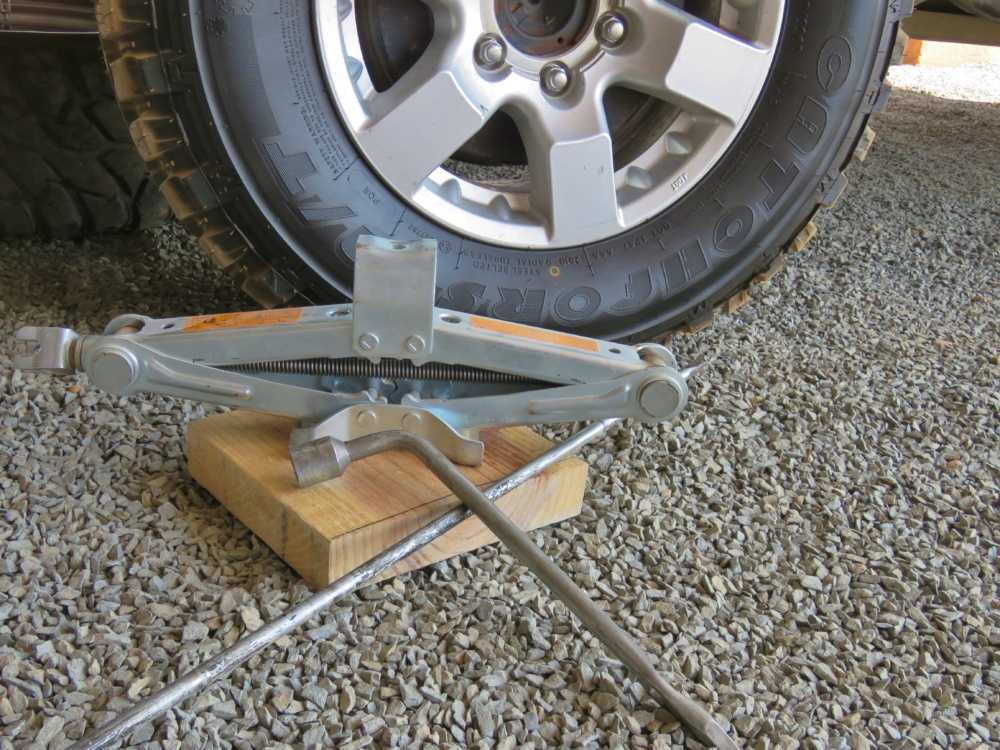
- Place the jack under the jacking point of the wheel that you need to change. A wooden plank is provided if you need the jack to be on a more even/harder surface.
- Use the jack to raise the vehicle off the ground.
- If using a hydraulic jack:
- Turn the valve to its closed position.
- Raise the upper disc of the jack by turning it anti-clockwise until it touches the car body.
- Assemble the handle by combining the two poles.
- Using the handle, pump the jack to raise the vehicle to the desired height.
- If using a mechanical jack:
- Turn the screw until the upper part of the jack touches the car body.
- Assemble the handle by combining the two poles.
- Hook the jack with the handle. Put the other end inside the hole in the wheel spanner.
- Use the wheel spanner as a handle to raise the vehicle to the desired height (turn clockwise).
While using the jack, and until the car has all four wheels touching the ground, no part of your body should be under the vehicle. Check that the jack is in a stable position before removing the damaged tyre.
- Remove completely the wheel nuts and store them away from dust/dirt.
- Remove the damaged tyre and replace it by the spare wheel.
If the new tyre does not fit due to lack of space, then deflate the spare tyre before placing it. Remember to put it back to the right pressure, using the air compressor, before starting to drive. In case it is still not enough, you can use the spade provided to dig under the wheel. - Screw the nuts back into place.
- Use the jack to lower the vehicle.
- If using a hydraulic jack:
- Turn the valve to its open position using the handle. The vehicle will lower itself.
- Remove the jack. If you have difficulty to do so, turn the upper disc in a clockwise direction to lower it and free some space.
- Turn the upper disc clockwise to put it back to it lower position. Push on the cylinder to lower it.
- Turn the valve back to its closed position and dissemble the handle before storing the jack.
- If using a mechanical jack:
- Lower the vehicle using the wheel spanner and the handle (turn anti-clockwise).
- Remove the jack and dissemble the handle before storing those tools.
- Tighten the nuts. Do not stand on the wheel spanner or use your feet to do so.
- Store the jack, wooden plank, wheel spanner, old wheel and warning triangles back in the car.
- Remember to remove the stones blocking the tyres and to check the pressure of the new tyre before driving off.
- Contact Namvic.
Post a Comment
You must be logged in to post a comment.


